trail food

Mountain House Meals - Meal Reviews

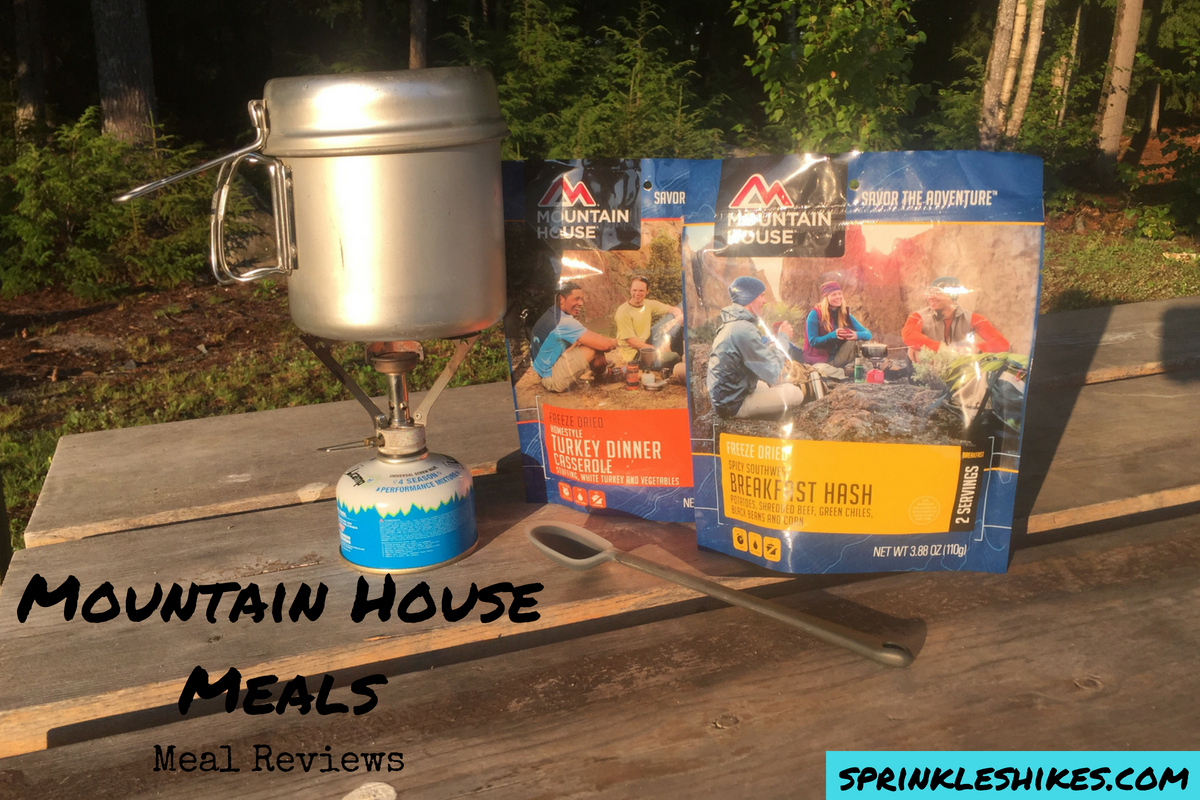
No matter how warm the weather, I like a hot meal while I'm backpacking.  I often cook both breakfast and dinner on trail.  While many hikers go no-cook or stoveless, I just don't think I'll be one of those hikers.  A warm meal is always my favorite way to start and end my day.  When it comes to cooking though, I like to keep things easy.  That sometimes means I'll turn to a freeze dried meal for simply heat-and-eat with no cleanup.  When Mountain House offered to send me two new meals to try, I was excited to give them a try.  

Mountain House Meals.png

Disclaimer: I received these meals in exchange for writing the review.  All opinions are unbiased and are my own.  

On a recent getaway I didn't leave myself much time to plan a trip.  On those spur-of-the-moment adventures it's great to have a few freeze-dried  meals I can throw in my pack and not have to worry about making sure I have all the ingredients.  Since Mountain House sent me two meals - Spicy Southwest Breakfast Hash and Homestyle Turkey Dinner Casserole, all I had to do was grab a few snacks, a quick lunch, and head out the door!

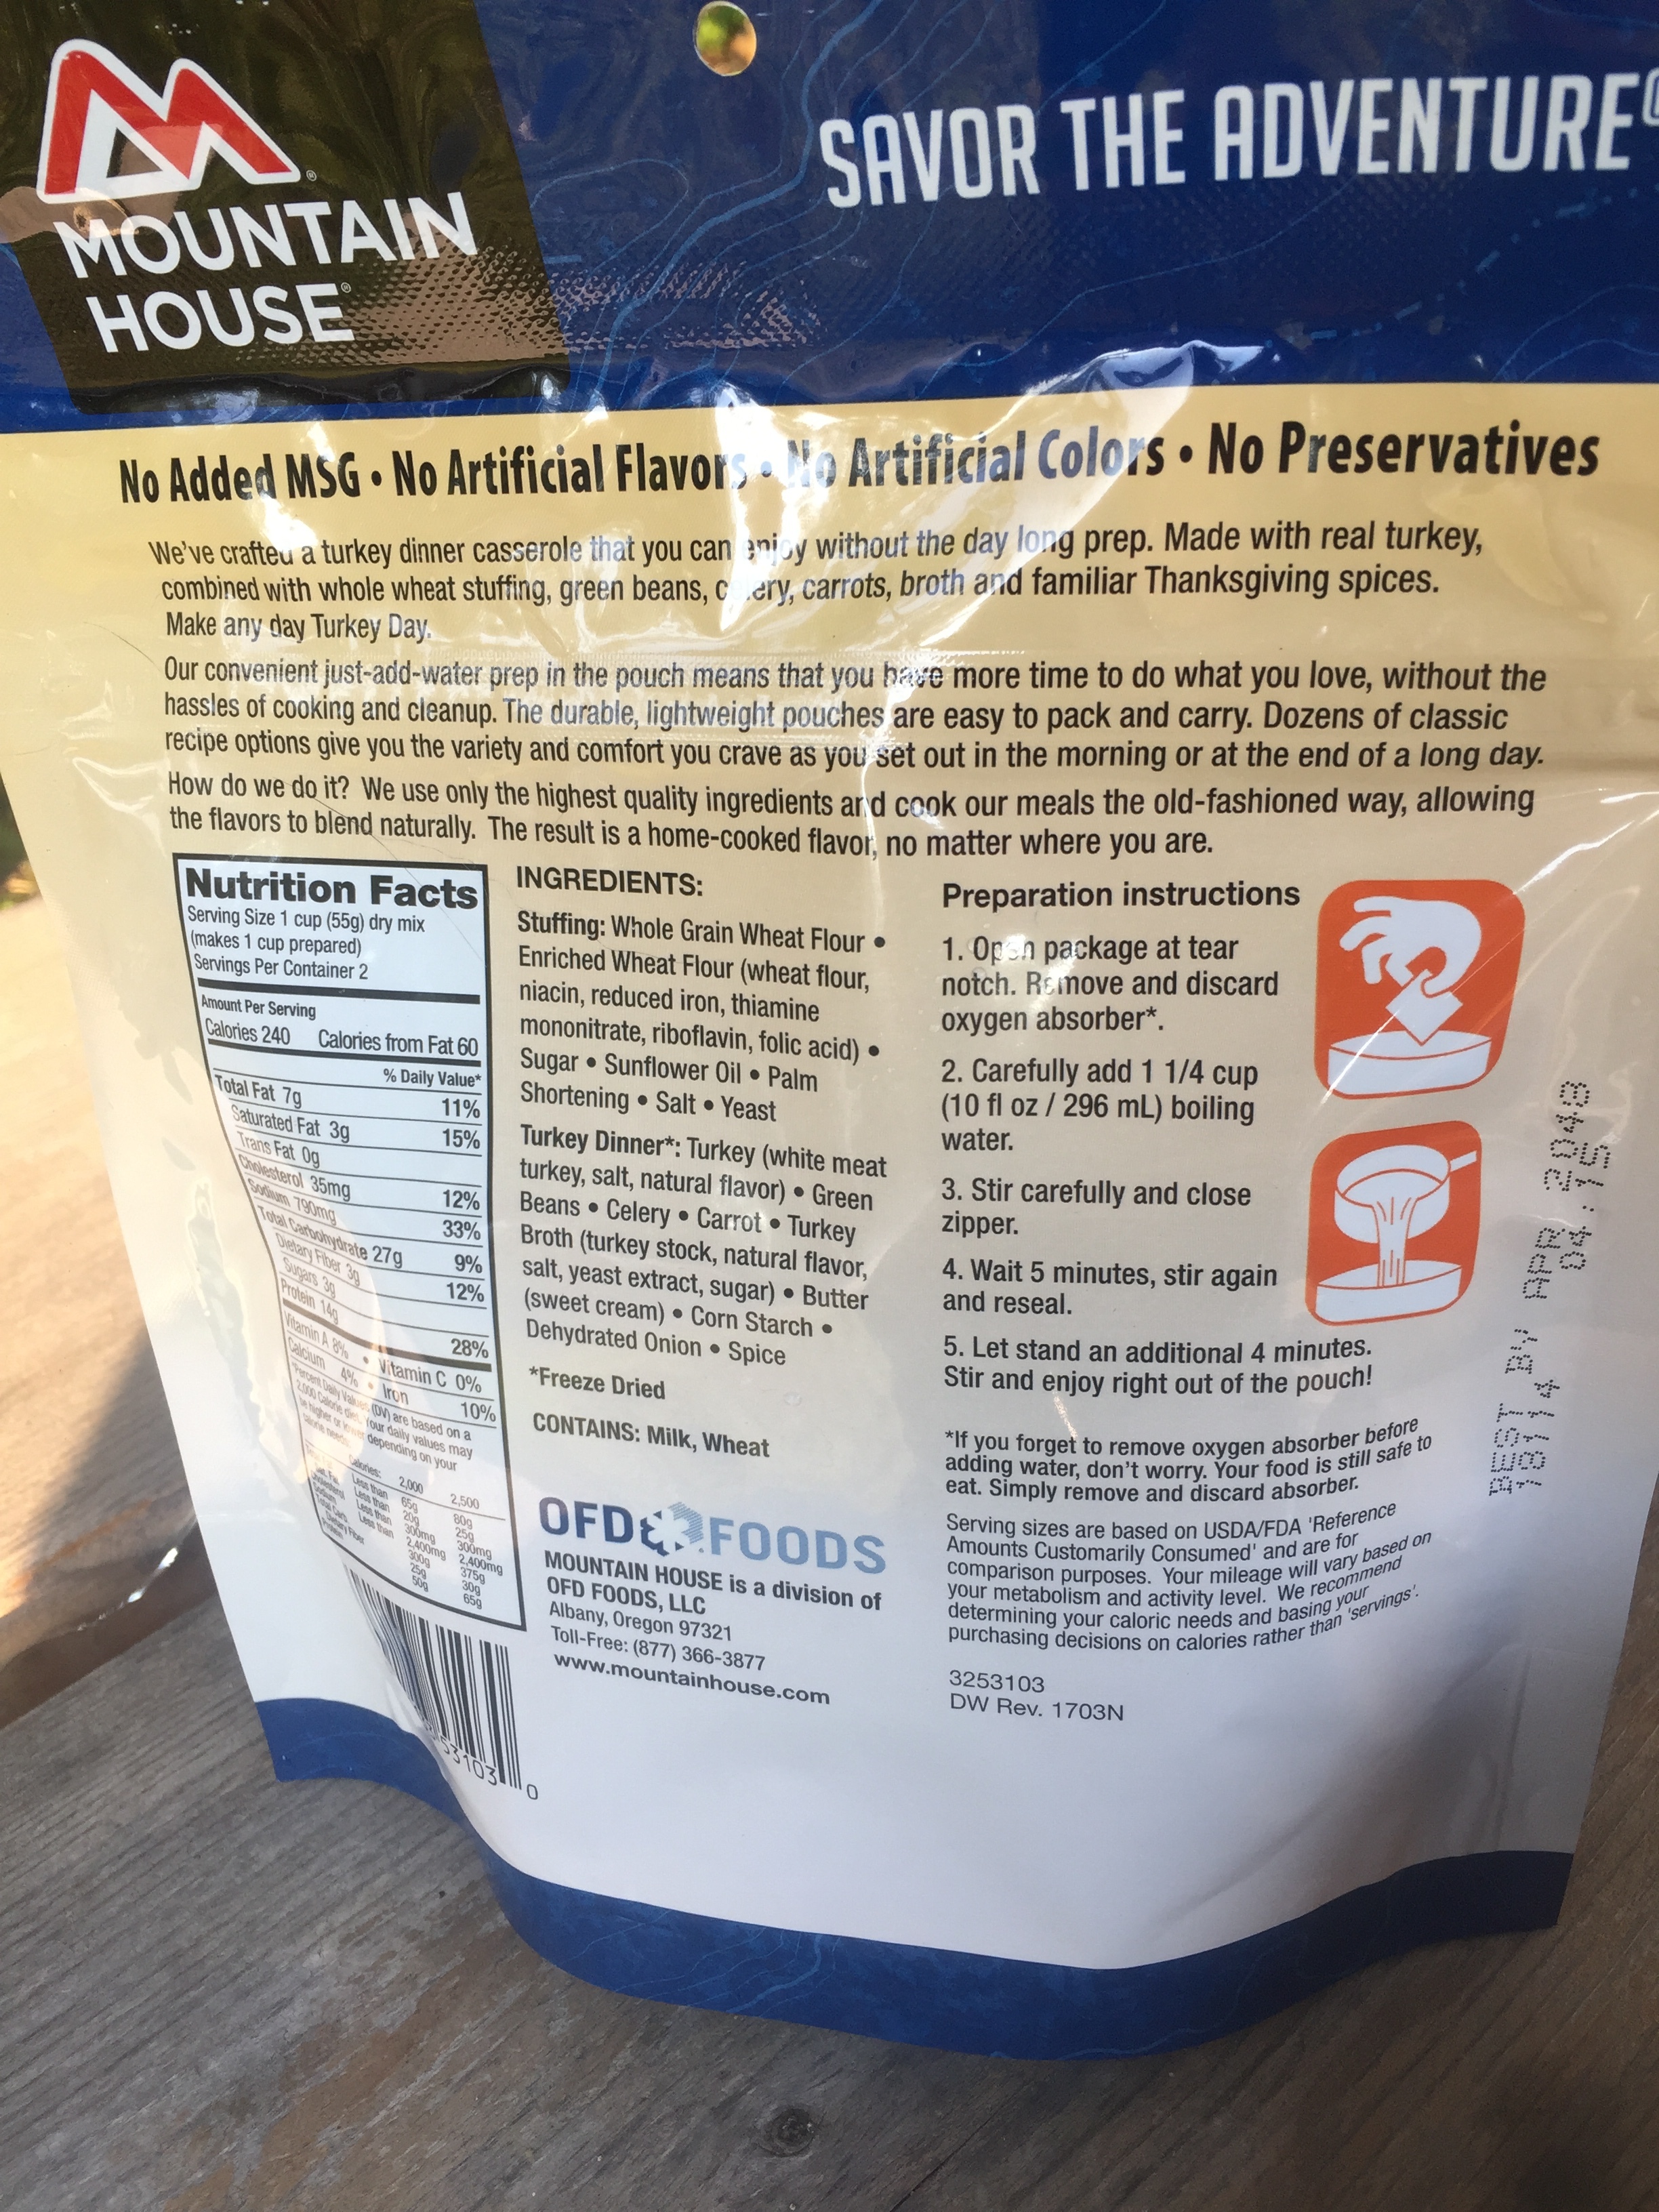
After a long day of hiking, I was excited to try the Homestyle Turkey Dinner Casserole.  Thanksgiving is a favorite meal of mine and I absolutely love turkey pot pie, so getting to have it in the backcountry was an added bonus!  The first thing I was struck by with this meal was the fact that there were real ingredients inside - check out the label: 

Real ingredients with easy-to-follow instructions. 

Real ingredients with easy-to-follow instructions. 

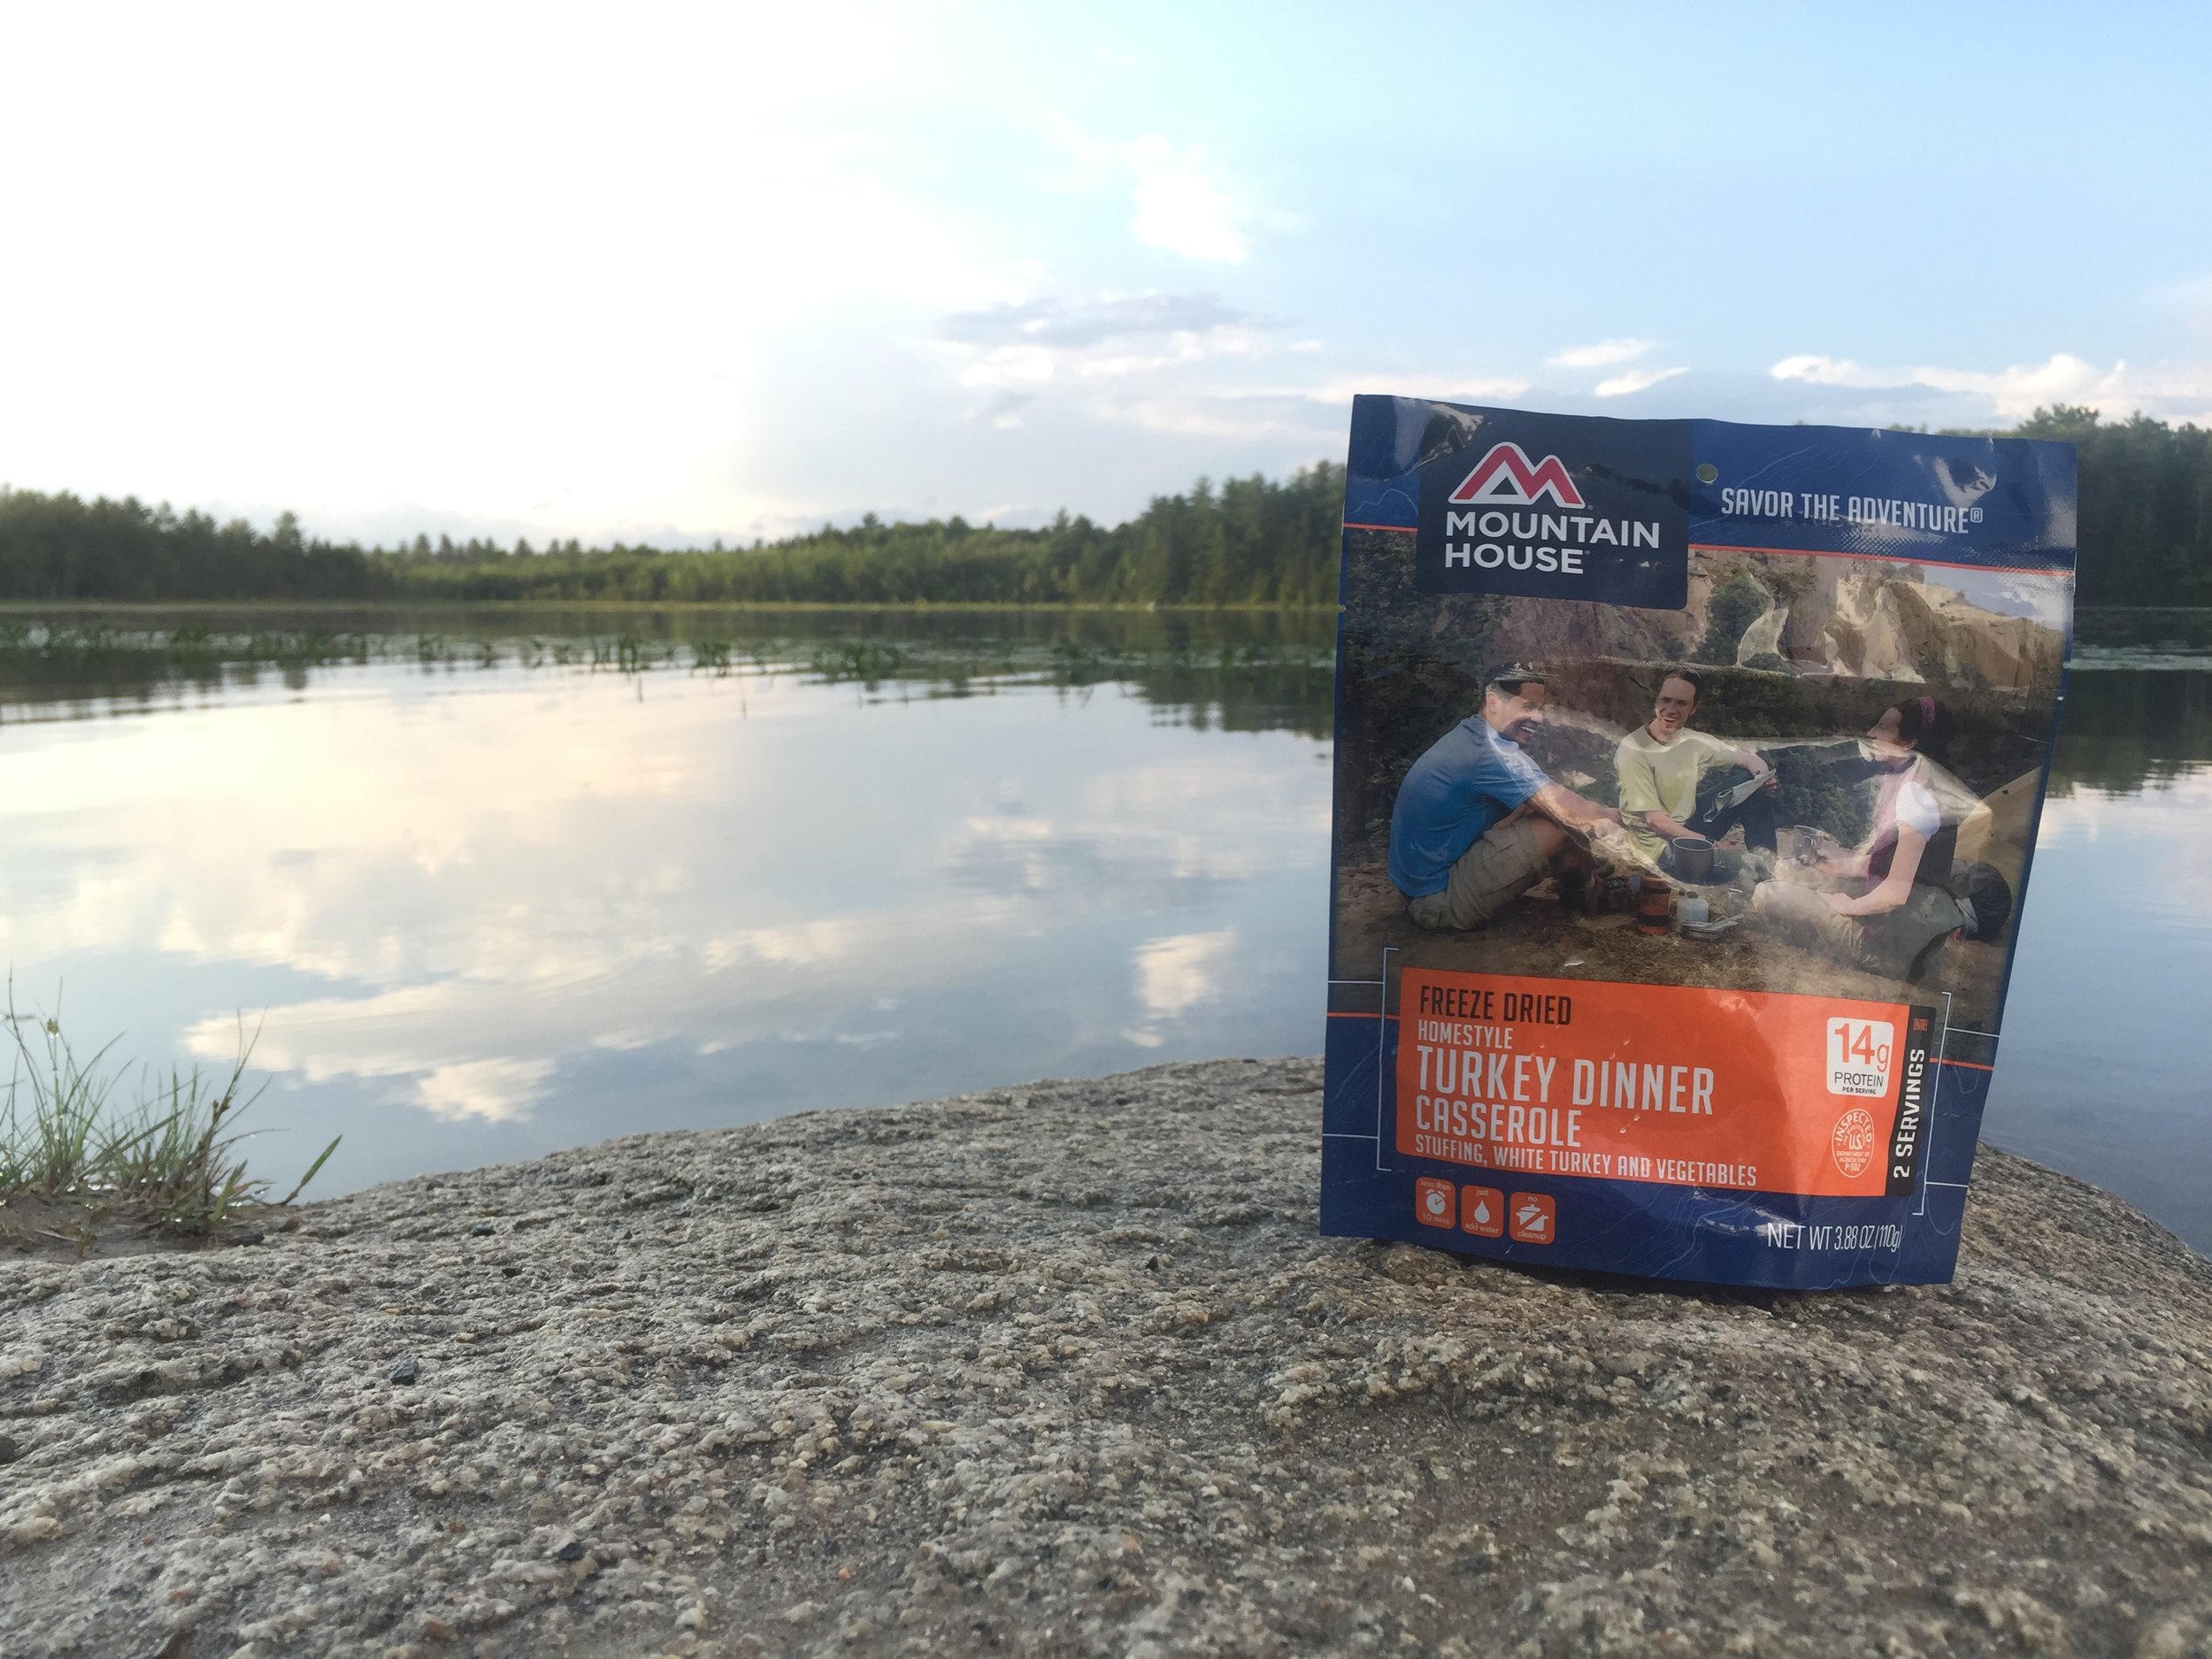
It was so simple to make this meal too!  The instructions tell you exactly what you need to do.  You'll even have time to set up your tent while you wait! This meal was really good and definitely reminded me of casserole.  Instead of the stuffing being on top, it was all mixed in and was super tasty!  The only thing missing was some green bean casserole!

Dinner on a pond in Maine - does it get any better?!

Dinner on a pond in Maine - does it get any better?!

When it came time for breakfast though, I was ready for some big flavors to accompany my coffee.  Enter the Spicy Southwest Breakfast Hash.  With the promise of having the "perfect amount of hot sauce" I'll admit I was skeptical.  All hikers love their hot sauce, and I'm no exception to that rule.  With hash browns, corn, black beans, chiles, and shredded beef, I knew I'd be nice and full for my hike out too.  After removing my oxygen absorbing pack and adding hot water, I impatiently waited to stir and eat.  

Don't worry - it won't hurt you!  Just take out the oxygen absorber and add water!

Don't worry - it won't hurt you!  Just take out the oxygen absorber and add water!

To my surprise, Mountain House was right - there was a decent amount of spice in this meal, but not too hot.  I didn't feel the need to add any additional hot sauce to my breakfast, which isn't always the case.  My favorite thing about this meal is the fact that it DIDN'T have eggs in it.  I'm not the biggest fan of freeze dried eggs, which you'll find in their other savory breakfast meal.  The fact that I got to eat potatoes and have a savory breakfast was definitely a bonus for me that morning!  This meal would be great with an avocado on the side or even with some warm tortillas!

If you're looking for an easy way to hit the trail with minimal clean up, these Mountain House meals are the way to go.  Having a filling, savory meal for both dinner and breakfast the next morning really helped me enjoy my hike.  

Have you tried either of these meals?  What are your favorite freeze dried meals? 

Chicken Piccata - a Trail Recipe

Add subheading.png

For the past two weeks, I've been doing lots and lots of meal prep.  For those of you who don't know, for thru hikes less than 1000 miles I prefer to do all of our meals as mail drops instead of resupplies.  In doing a trail like the Mountains to Sea Trail, we are giving up the convenience of being able to easily get into town, especially for the first several hundred miles.  We will be mostly parallel to the Blue Ridge Parkway and it makes it much easier for us if we do drops instead.  Our first mail drop will consist of a post office less than a quarter mile from the Parkway and our second will be at a hotel that sits right on the Parkway.  Having mail drops right on the trail is so much easier than trying to hitch off a scenic byway and get back up to it - especially on a trail that doesn't see so many thru hikers!  

While I was going through my favorite recipes for this trip, I decided to use a few of our old favorites, as well as test out some new recipes.  I also decided to attempt and create one of my favorite dinners - chicken piccata.  I know Backpacker's Pantry offers this as an option, but at $11.00 per meal (and it's definitely not a two-serving meal at only 350 calories per serving!) this is not only cost prohibitive, it's also bulky in their big packaging.  I decided to see if I could recreate this meal at home with dehydrated products and I am super excited with the results!  Being able to have one of your favorite meals on the trail is a great way to end your day.  The recipe for you to recreate is below. 

Sprinkles' Chicken Piccata

1 cup of dried pasta of your choice (I recommend small pasta, like farfalle)
1/4 cup freeze dried chicken (or dehydrated canned chicken)
1 tablespoon of dried capers* (see below for instructions)
2 teaspoons butter powder
1/4 teaspoon (or one packet)  True Lemon powder

Directions: 
At Home:  Take the 1 cup of dried pasta and the 1/4 cup of chicken and combine in a sandwich-sized Ziplock bag.  Combine the capers, butter powder, and lemon powder in a separate snack-sized Ziplock bag.  Place the smaller bag inside the larger bag and seal. 

On Trail: Remove the small Ziplock containing the "sauce" powders and capers and set aside.  Dump the pasta and chicken into your cook pot and cover with water by a 1/2 inch.  Cook on a low flame, stirring to make sure the pasta doesn't stick to the pot.  When your pasta is done, you shouldn't have a ton of extra water in your pot - just starchy water barely covering the pasta and chicken.  Add the powder and capers from the smaller bag directly to the pot and turn off the heat.  Let it sit for a few minutes to rehydrate the capers and enjoy directly from the pot.  

*To make dehydrated capers, drain capers from their brine and place on a fruit leather sheet or piece of parchment paper on your dehydrator tray.  Dry at 135 degrees for approximately 4-6 hours (depending on the humidity), until they are leathery, but dry.  If you don't own a dehydrator, you can always place them on a baking sheet and put your oven on the lowest possible setting with the door cracked open for 2-4 hours.  

What is your favorite meal at home?  Would you ever attempt to recreate it on trail? 

Breakfast Couscous - Trail Recipe

Breakfast is definitely my favorite meal of the day.  I don't always eat it first thing when I get up, but I can promise I eat a proper breakfast of some kind every single day.  Trying to get in a healthy breakfast while out on the trail can be tough, especially with all the convenient grab and go options out there.  Getting ready for my Tahoe Rim Trail thru hike in 2017 has me prepping lots of easy breakfast options and breakfast couscous is a quick and easy go-to that I enjoy both on the trail and when I need to grab something quick to take with me.  

Breakfast Couscous (2 servings)

1 cup whole wheat couscous
1/3 cup dry coconut milk
2 tbsp brown sugar
3/4 tsp cinnamon
1/4 nuts of your choice (slivered almonds are my favorite!)
1/4 dried fruit of choice

At home: Add all ingredients to a mixing bowl and stir to combine, paying attention to the brown sugar as it has a tendency to clump.  Once all items are mixed, split into two portions in zip top bags.  Seal. 

On Trail: To eat cold, add cold water to your couscous before going to bed - just enough to cover the couscous by about an inch.  Seal the bag and squish it to mix.  Eat cold in the morning.  If you'd like it hot, add couscous to your cook pot and cover with water, about an inch to an inch and a half over the mixture.  Bring to a boil, remove from heat, stir, and let cool.  

Trail Mac 'N Cheese - Trail Recipe

There are fewer meals hikers love more than Mac 'N Cheese.  When I was thru hiking on the AT, Mac N Cheese night more often than not meant a box of the cheapest stuff at the store without any milk or butter to make it more delicious.  Then, you’d wipe the pot clean with whatever kind of bread you had to clean it up.  Mac 'N Cheese is a fun comfort food, but when you’re making your own meals with nutritional factors in mind a box of the cheapie stuff just won’t do.  Here’s my recipe for Trail Mac that will definitely leave you wanting more!

Trail Mac - 1 serving

1/2 cup macaroni of your choice (does not need to be precooked!)
1/4 cup dehydrated veggies
1/2 tsp dried onion flake
1 tbsp + 1 tsp cheese powder
1 tbsp full fat powdered milk
1/4 tsp dried parsley
1/8 tsp garlic powder
1/8 tsp cayenne pepper
1/8 tsp paprika
1/8 tsp red pepper flake

At home: Add the macaroni, dehydrated veggies, and onion flake into a sandwich size zip top bag.  Add the cheese powder, milk powder, and spices to a smaller snack size zip top bag and mix to combine.  Seal the smaller bag, add to the larger bag, and seal.  

On trail: Add macaroni to your pot and cover with water (just to the tops of the pasta).  Bring to a boil, stirring every few minutes to avoid sticking.  Cook pasta to desired level of doneness and stir in the contents of your spice/cheese packet.  Let meal sit, stirring occasionally, until the sauce thickens.  

Hawaiian Rice - Trail Recipe

Since NoKey and I are getting ready to tackle another thru hike in 2017 I thought I'd start sharing some recipes with my readers.  A few years ago, when we took off to do a series of smaller thru hikes, I decided to attempt home dehydrating all our meals for a few reasons. Home dehydrated meals are economical and a lot more healthy than just eating a few of the same Lipton Sides over and over again.  It keeps your tastebuds and your wallet happy!

One of our favorite recipes a few years back turned out to be Hawaiian Rice.  This also was the first meal we ever ate out on the Benton MacKaye Trail.  I wanted to eat it first because I was entirely convinced I'd hate it.  This one, however, became an instant hit!  Every time we'd see it in our resupply boxes we'd do a happy dance.  Check out my recipe for Hawaiian Rice below!

Hawaiian Rice (1 Serving)

1/2 cup home dehydrated brown rice (cooked in veggie stock)
2 tbsp home dehydrated pineapple
1 tbsp home dehydrated bell pepper (broiled and blackend before dehydrating)
1 tbsp dried onion flake
1 tbsp unsweetened flaked coconut
1/4 tsp salt
1/4 tsp powdered ginger
2 tbsp bacon bits or ham-flavored TVP
1/2 tsp ham base

At home:
Add the rice, pineapple, bell pepper, onion flake, coconut, salt, and ginger into a sandwich size zipper bag and mix well.  Add the bacon bits/TVP and ham base to a snack size zipper bag and mix well; seal the bag.  Add the small zipper bag into the larger bag and seal shut.  

On trail: 
Separate the two bags.  Add the contents of the large bag to your cook pot and cover with water - you are just covering the ingredients here, no need to measure.  Stir and then bring to a boil.  Stir and then remove from the heat.  Add the contents of the smaller bag and stir again.  Let meal sit for 5-10 minutes until it reaches your desired thickness and consistency and enjoy!

This recipe was adapted from Chef Glenn's Hawaiian Shrimp and Rice.  I cannot recommend his website enough if you're looking to learn how to make your own backpacking meals!

Have you made your own dehydrated meals before? How did it go? 

Better Nutrition for Backpacking

Thru hikers of any distance trail are notorious for eating highly processed, fatty, best bang-for-your-buck calorie bombs for meals.  If you’re an ultrarunner you definitely know what this is like.  When you’re out burning thousands and thousands of calories per day and you’re supporting yourself by carrying all your own fueling options, you know that lightweight, high-calorie foods are king on trail.  While the best way to get better nutrition on trail in remote locations would be to make your own food, here are some hacks to help you get in some better nutrition during your next long-distance adventure. 

Chia Seeds: 

Chia seeds pack in some serious nutrition.  With fiber, protein, and omega fatty acids, adding a tablespoon or two to oatmeal in the morning will pack in more punch to get you moving.  You can also make your own chia energy drink at lunch time by mixing in some chia seed with your favorite electrolyte replacement.  

Protein Powder: 

I am a huge fan of adding chocolate protein powder to my cup of coffee in the morning on trail.  While I personally use whey protein, you can chose your favorite and add it to your coffee or tea before breakfast for a quick nutrition boost.  While chocolate in coffee is the most popular on trail option, you could also use vanilla or unflavored powder with coffee.  Vanilla powder with green tea or chai powder with coffee are also amazing flavor combinations. 

Nut Butter Packs: 

Peanut butter on trail doesn’t have to be cheap store brands loaded with sugar and palm oil anymore!  With more and more brands hitting the market, like Justin’s, Peanut Butter & Co., andBogg’s Trail Butter coming in single serve packets, it’s simple to get your fix on the go.  Bonus nutrition points to you if you consume a pack with a fresh apple you’ve packed out of town!

Coconut Oil:

Coconut oil comes in solid form and is super simple to add to any meal you’ll be making over your camp stove.  Another great bonus to using coconut oil is the fact that it can also be consumed by the spoonful.  Being high in saturated fat and easy to digest, this stuff is delicious to add to any Knorr Rice Side you’ll be eating for supper. 

Gummy Vitamins: 

When all else fails, you can always add some adult gummy vitamins to your food bag.  Chewing up two of these guys at the end of a long day after you’ve finished your supper on trail can help suppress that after-dinner sugar craving many hikers get after burning thousands of calories hiking.  

Choose Healthier Options in Town:

Heading into town every few days to resupply usually means eating a meal in an actual restaurant - one you won’t have to cook over your camp stove!  While images of greasy pizza and juicy burgers will dance in your head all the way down to town, adding a salad to your meal won’t hurt either.  If you absolutely must have that whole large pizza, consider getting extra veggies as toppings.  The same goes for your hamburger - ask for extra lettuce, tomato, and onions to go along with that delicious goodness!  Consider a healthier appetizer as well - hummus is always a great option that is on many menus. 

While many people joke about the thru hiker diet, it can actually be easy to work in some sneaky healthy foods.  Do you have any tips for working in some healthy fats and proteins on distance hikes? 

Fuel 100 Electro-Bites: A Food Review


Update: Use code SPRINKLES at checkout for 25% off your order (not an affiliate link, feel free to share!) 

With the heat of summer in full swing I've been constantly attempting, and sometimes losing, a battle with my electrolyte balance.  Between my work outdoors as a full time hiking guide and helping my boyfriend train for his first half marathon, I've been spending a lot of time in the low elevations of East Tennessee - often times in sweltering heat and humidity with heat indexes in the high 90s and low 100s.  When I was offered the opportunity to try out Fuel 100 Electro-Bites I jumped at the chance to try something new.  Here are my thoughts on this product. 

After doing some research regarding Fuel 100 Electro-Bites I was excited to try them out for two reasons - the first being that they weren't fruit chews and the second being that they weren't sickly sweet.  While this product comes in five flavors, only three of them are flavors that sound sweet: pumpkin spice, apple cinnamon, and salty vanilla.  The other two flavors are simply salty and salty vinegar.  This immediately appealed to me because of recent I've been all sugared out and I've been on a quest for savory fueling options that are also easy to eat on the trails or on a run.  These tiny bites fit the bill!  The other thing that appealed to me was the fact these were a dry, baked product.  No sticky gels, chews, or sweet drink mixes.  Don't get me wrong, I love a sweet electrolyte tab after a hot and long run, but getting the chance to try something different was definitely a plus!

I took these out on a training run on a night when the heat index at sunset was 94 degrees.  Even though I ran an easy 3.5 miles I knew I had sweat more than I did on 10 mile runs back in the winter time.  If I don't replace electrolytes immediately I usually get dull and throbbing headaches so being able to grab them and go was a big plus for me.  I ripped the tab off the bag of the apple cinnamon bites and dug in!  The first thing I noticed was the fact that even though these bites were dry, they didn't make my mouth feel dry.  The crunchy little bites were actually fun to chew and were easy to swallow despite being hot and sweaty.  I was able to follow the bites by drinking down some cold water and felt great.  The apple cinnamon flavor was very mild and the hint of coconut oil was delicious as well. 

Easy to refuel after a long, hot run! 

Easy to refuel after a long, hot run! 

I also brought along the salty vinegar flavor on a longer day hike during a humid and hot June afternoon.  The vinegar flavor wasn't overpowering and again the coconut oil was very mild and present as well.  These bites stored well in a pack and since they're baked they don't melt the way an electrolyte chew would.  You also don't have to worry about adding a tab to water and waiting for it to mix before drinking.  All you have to do is rip the top off and start snacking!

I've got my fuel for after the hike! 

I've got my fuel for after the hike! 

Personally, I loved these little electro-bites and would definitely buy them again.  The fact that they're so much different from anything I've tried recently really sold me on this tasty and quick fuel for athletes.  They're formulated for distance athletes and have 100 calories per pack, including 190mg of Sodium, 55mg of Potassium and 46mg of Magnesium. Fuel 100 Electro-Bites will have a place in my pack for the rest of the season for sure!

A handful of baked electro bites - yum! 

A handful of baked electro bites - yum! 

Have you tried any new electrolyte replacement products recently?  What's your favorite way to refuel during a hot and humid summer run or hike?

Disclosure of Material Connection: I received Fuel 100 Electro-Bites for free from Fuel 100 as coordinated by Outdoor PR in consideration for review publication.  All opinions, as always on this blog, are my own.

My Five Favorite Trail Lunches

Recently I started growing tired of my usual PB&J on flatbread or a ProBar for a trail lunch and began looking for something more creative.  When I was online looking for ideas something simple came to me and I couldn't believe I hadn't thought about it before - dehydrating something simple and savory for lunch!  While so much of the food backpackers can find in the stores for lunch is sweet, like a trail mix, granola bar, or Poptarts, I realized that if I did my own dehydrator meals for lunches I could get some more savory foods into my backpacking diet.  Here is a rundown of some of my favorite food to eat for lunch. 

1) Hummus and crackers with veggies - Dehydrating hummus was such a simple idea I couldn't believe why I hadn't thought of it before.  Simply spread your hummus on a fruit leather tray (or piece of parchment paper in an oven or on a regular dehydrator tray) and dry overnight.  On my Excalibur dehydrator I went to the 125-degree setting for 12 hours.  In the morning the hummus should be very powdery and easily crumble.  One container of hummus (10 ounces) should make four servings for those of us who backpack on shorter easier trips.  If you're doing mega miles one container should get you two servings.  Rehydrating is simple and quick - use cold water to cover the hummus powder by 1 inch and squish the bag around for 5-10 minutes.  I usually eat mine with Good Thins crackers and whatever fresh veggies I want to pack out.  I've packed out carrots, celery, and radishes with good results even in the summer.  

2) Dehydrator burritos - Mixing a can of refried beans with a can of enchilada sauce in a large bowl and then spreading thin on dehydrator fruit leather sheets (or parchment paper for those without the sheets) can create a delicious burrito filling for the trail.  Simple dehydrate overnight at 125 degrees and in the morning you'll have a crumbly, powdery bean burrito filling! Rehydrate in a freezer bag for 10-30 minutes with cold or hot water.  Spoon into your tortilla and put salsa on top and you'll have a filling lunch!

3) Pepperoni and Laughing Cow Cheese sandwich - Carrying pepperoni and Laughing Cow cheese are usually a staple on a long trip.  Laughing Cow comes in several flavor varieties and you can use a bagel thin or a sandwich thin for the bread.  Switching up the flavors of cheese and bread every so often turns this trail staple into something different!  Laughing Cow cheese is generally like shelf-stable cream cheese.  I've had some in my pack for up to 5 days in the summer and it's still holding it's shape.  

4) Flavored Couscous - Near East brand makes some wonderful couscous flavors.  While I normally eat the entire box for a hiking dinner, a half portion works great for lunch for me!  Before hitting the trail, split the box evenly between two freezer bags.  Make sure to shake the box well before splitting if the spices are already mixed in with the couscous.  If you are making your own flavored blend at home, I find the 1/4 cup serving of dry couscous works well for lunch.  If it's a cooler backpacking trip you can heat up some water, but most of the time I just add cold water and let it soak for at least 15 minutes before I eat it.  Cold hydrating works very well for couscous!

5) Flavored Tuna and Flatbread - There are now several flavors of tuna on the market, including a few in olive oil instead of water.  Right now I'm loving the Mediterranean Style Sunkist tuna on a sandwich thin, but with all the flavors of tuna and salmon on the market right now it makes it easy to have a different flavor every day of the trip!

These are just a few of my favorite savory backpacking lunches.  Do you prefer savory or sweet foods on trail?  What is your favorite lunch?

I'm linking up with CourtneyCynthia and Mar and some of the other folks who link up with us – and please don’t forget to link to your hosts if you are participating!

What Do Thru Hikers Eat?!

Whenever I'm out on the trail, whether it's a short trip for work or a month long hike (or even longer!) people who have never done a backpacking trip often ask me how I eat on the trail when I'm staying in the woods.  I usually give them the short answer of "I carry food!" because many people just assume I forage or hunt or even carry tons of canned goods (yes, really!). Since I've been doing a lot of advice posts recently, this post is aimed at newer backpackers who are still confused as to what to bring to eat for longer distance hikes.  While there are so many wonderful options out there, here are the most common things people carry on thru hikes.  It should be noted that I dehydrated all our food from recipes for our hikes last summer, so more intensive backpacking "recipes" won't be covered here - stay tuned for future posts for people looking for recipe inspiration (as well as healthier options)!

Breakfast Ideas

Breakfast is a toughie because some people just don’t like breakfast.  If I don’t eat breakfast I crash and burn fairly quickly.  I also was never a coffee drinker until I hit the trail but once I really got into the routine, I found a warm cup of coffee was perfect for me most mornings. On hot summer mornings I often just made it with cold water for an "iced coffee"!  If you don’t think you’d like coffee, any warm liquid is often nice in the morning to get everything in your digestive tract “moving.”  Instead of hot chocolate, I really recommend Carnation Instant Breakfast packets.  They have a coffee flavor and two different chocolate flavors, as well as vanilla and strawberry.  There is at least SOME nutrition in this, as well as a LOT sugar to perk you up. My personal favorite for a breakfast drink is coffee with a pack of Carnation.  It’s like a hiker trash mocha, haha!  

-Two packets of instant oatmeal - two will at least give you calories. Interestingly enough if you look at a pack of instant oats you'll see something you probably never noticed before - a fill line. That's right, you can eat this stuff right out of the packs for easy clean up!  Just be careful with super hot water.  I often ate it cold on trail. 

-Two packets of instant grits or cream of wheat

-ProBars (340 calories - whole food energy)

-Little Debbie Cakes (sugar energy)

-Honey Buns (iced honey buns have the most caloric bang for your buck, often packing in close to 600 calories for only a few ounces of weight)

-Pop tarts

-Bagels with shelf-stable cheese (Laughing Cow will last up to 5 days in a pack) or peanut butter, cookie butter, or Nutella

-Peanut butter and granola bars (Nature Valley type)

Lunch Ideas:

I am a fan of stopping for a proper lunch.  I like to take breaks when I hike and I find a proper lunch break makes me feel better in the afternoon.  Lunch ideas are often the same as breakfast with a few tweaks. 

-Peanut butter and honey on a tortilla or the sandwich thin bread or bagels (I hate tortillas, so I opt for bread)

-Pepperoni/summer sausage and Laughing Cow Cheese (or regular cheese) on a bagel or bagel thin

-Pop tarts with peanut butter, eaten like a sandwich

-Tuna or salmon packets with tortillas or sandwich thins. I don't know if any of you have noticed, but they make so many flavors of tuna now and I even recently saw two different flavors of salmon!  Spam packets also are popular for lunches.

Dinner Ideas:

Dinner ideas can be crazy versatile.  There is really more food out there than you’d think, but if you don’t shop for processed food often it’s hard to figure this out.  Sometimes you just have to be creative and do without things and be good at improvising.  The only thing I recommend staying away from for trail dinners is quinoa - it takes 18 minutes to make and that’s active cooking time.  Fuel canisters can only last 60-75 minutes, so it burns up a lot of fuel on your stove!

-Near East CousCous (There are a TON of flavors and its fast!)

-Ramen - you can add peanut butter and dried veggies for a “pad thai”

-Mac and Cheese - even without butter and milk powder this works well!

-Knorr pasta sides or rice sides - these generally cook in 8-10 minutes, but can be done in as few as five active with 10 extra for sitting and soaking

-Instant mashed potatoes - they come in several different flavors

-Stovetop stuffing - surprisingly filling for a dinner or you can mix them with potatoes 

-El Paso Ready Rice - there are tons of precooked rice packs out there in lots of flavors. Unfortunately, these are heavy, but are great for a first day out of town

-Asia Kitchen makes Chinese food that is much like the ready rice - just heat for a few minutes and serve

-Taste of India makes Indian dishes that are heat and serve (and these make other hikers REALLY jealous when they smell them!)

Snacks: 

I usually eat three meals a day and two snacks when I am hiking. I have breakfast around 7:30 a.m., a snack at 10 a.m., lunch around 12-1 p.m., a snack around 4 p.m., and dinner at camp.  This is my magic recipe for not feeling “hangry” during the day!

-Nature Valley Granola Bars, Clif Bars, Kind Bars - any kind of bar really!  I would AVOID anything labeled as a protein bar or body builder bar.  These bars have sugar alcohols as an ingredient and sugar alcohols are notorious for making you need to poop VERY badly. I made this mistake a few times on trail and it’s HORRIFYING. 

-Goldfish Crackers, Cheeze Its, Triscuits - most crackers like this hold up for a few days pretty well

-Fruit snacks

-Trail mix - can be heavy as most bags are an entire pound, but if you make a good dent in it each day it should be okay

-Cheesy Popcorn - holds up surprisingly well in a gallon sized freezer bag and is a personal favorite of mine

and of course, CANDY!  The mini candy bars are what I always went for. The packs of 8-10 are the best because it’s just enough of a snack, plus you can usually eat two per day. Sometimes I would have one with lunch and one with dinner as a dessert. 

I should also note that for people who don't often eat a lot of processed food products, it can be really hard on your stomach and body to immediately begin consuming large amounts of this stuff.  For me, by the time I got to Hot Springs, I constantly felt kind of queasy.  I picked up a package of Flintstones Chewable kids vitamins and took two of them every night before I brushed my teeth and they really helped me feel better.  Several others who noticed me doing this also reported good results.  Since then, they've come out with adult gummy multivitamins and NoKey does really well chewing those up every night.  I personally cannot take regular adult multivitamins because I get stomachaches from the iron content.  So, in short, if you start feeling run down and crappy fairly early on, consider adding a multivitamin to your diet!

And yes, I know I may have forgotten (insert whatever it is you think I forgot here).  There are so many different food choices out there and so many different dietary needs. Some people prefer to not even carry a backpacking stove, so this article doesn't even begin to touch on all of those things!  I'm just covering the bases for any new or wanna-be hikers who are looking for ideas that are cheaper than Mountain House type meals and will be cooking. 

Well, there you have it!  A quick and dirty list of foods I commonly see on the trail that long-distance hikers are eating.  Are you horrified at what thru hikers consume?! What do you normally eat on the trail? Are there any foods you love or foods that you can't even bear to look at after eating them so often on a hike? I'd love to hear your favorites! Leave me a comment below or find me on Facebook or Twitter to get the conversation started!

One Summer, Two Hikers, Three Trails, and Not a Single Lipton Side in Sight!

An entire summer worth of food stretched out all over our spare bedroom!  Everything we will be consuming on our three hikes is here. 

An entire summer worth of food stretched out all over our spare bedroom!  Everything we will be consuming on our three hikes is here. 

I've finished!  A week ahead of schedule I have all of our food dehydrated, packaged, and ready to mail out to a friendly post office near the trail somewhere in the eastern portion of the US.  Thanks to a friendly hiker on Instagram I have also learned that Priority Mail Regional boxes will save me a FORTUNE!  Seriously, go to the USPS website and order your own regional boxes.  They're bigger and, for the BMT if we mail them from my parents house, we're going to save SEVEN BUCKS a box!

So, here's the breakdown of what I've made meal-wise for the summer:
Breakfasts: Sweet potato pudding, rice pudding, pizza grits, breakfast couscous, assorted Poptarts.  I also made a special breakfast drink out of Carnation Instant Breakfast, powdered coconut milk, and instant coffee.
Lunches: Refried bean burritos with salsa, dal with tortillas, sandwich thins with peanut butter/cashew butter or tuna, Poptarts
Dinners: Dal with rice, Hawaiian-style ham and pineapple rice, "soul food" with brown rice and blackeyed peas, mushroom stroganoff with egg noodles, mac & cheese, sloppy joes, Thai-style ramen. 
Snacks: Picky Bars, candy bars, trail mixes, dehydrated apple chips

We'll have enough dinners to get through the trail and we'll need to supplement still with the tuna packets and the peanut butters.  I don't have either of those meals planned for the BMT though, so the shopping for the tuna can wait until we're back in NY for the Finger Lakes Trail. I'm hoping that our portion sizes for the meals we've chosen work out alright.  The hardest part of planning all this cooking has definitely been the fact that the meal sizes all seemed to vary SO MUCH!  One recipe I made, the dal, called for serving 3 people.  I ended up getting 14 servings out of it with the measurements provided in the recipe!  I ended up with more dinners and less lunches due to these sorts of discrepancies, but hikers are great at adapting and if we end up having to cook lunches - so be it!

I had a few people ask me how expensive it was to do all these meals so here's the price breakdown:  I had budgeted approximately $400 for food and shipping and I'm happy to say that after we ship everything I will be under $400 for the entire summer.  That's for TWO people plus shipping!  For an average AT resupply, I was typically spending $25 to $30 per stop on just myself.  So, if we say that NoKey and I were spending $30 per person on our summer hikes, we'd be spending approximately $480 on food.  This, of course, assumes we'd be able to even get to a decent store on these trails!  The BMT goes through smaller towns than the AT - smaller towns which also see less hiking traffic than the AT and aren't quite resupply friendly.  Most of our options are tiny stores or convenience stores.  Those types of stores don't often carry much and are often insanely expensive.  Since I've done our food, I know we'll have the nutrition we're looking for, as well as the variety to keep us from getting sick of everything we're eating.  I know the Long Trail will have better resupply options on the southern portion so when the lunch/breakfast situations starts to look slim, we can supplement for a regular town resupply for breakfast items.  

I hope you've enjoyed seeing all the food prep I did over the past few weeks.  I'm very excited to get out and get hiking and can't wait to share the journey with you guys.  Happy Trails!

Trail Magic and Trail Food Cravings

Yesterday we made a surprise trip down to the Finger Lakes Trail to pick up our friends Buttons and Bearwalker.  They're thru hiking the North Country Trail, 4500 miles from Vermont to North Dakota, and needed a ride to the post office.  Since New York isn't exactly hitchhiker friendly, especially when people aren't used to seeing them, they only had a short amount of time to get to their resupply box, which had their dog food in it.  Since Molly  had run out of food and the post office was closing soon, we rushed down to get them, getting them to the post office at 5:05 p.m.  Even though they closed at 5, the postmistress still allowed them to pick up their package!  We got to hang out with them last night and have hiker talk, eat large amounts of food, and look at all their gear.  It was a great time with them and we dropped them back off at the trailhead today.  

When we got home I was pretty hungry and, probably due to being in full on hiker mode for the day, was craving ramen.  Yes, ramen!  The cheap staple of broke American diets and thru hiker cuisine de jour.  Since I was whipping up a ramen recipe for us to take on the trail, I figured it would be the perfect time to test out the spice blend I was planning on using on our batch.  With the fresh veggies I added from the fridge,  I had a steaming bowl of hiker supper!

Ramen with broccoli, portobello mushroom, red onion, and carrot.  

Ramen with broccoli, portobello mushroom, red onion, and carrot.  

Here's the trail recipe I developed tonight, and a photo of how nicely it all packs out to camp! (Links provided for hard-to-source ingredients!)

Thai Ramen, packed and ready to hit the trail!

Thai Ramen, packed and ready to hit the trail!

Thai Ramen - 1 serving
1 pack ramen of your choice (chili lime shrimp would be perfect!)
1/4 cup dehydrated mixed vegetables
1 tablespoon powdered coconut milk
1/2 tablespoon powdered peanut butter
1 tablespoon cashews
1 True Lime packet
1 Sriracha packet
At home prep:
+In a snack-sized zipper bag, combine the cashews, powdered peanut butter, and powdered coconut milk.
+In a regular-sized zipper bag, pour in your dehydrated vegetables, place a ramen packet inside, and add the packet of True Lime and sriracha sauce. 
+Add the snack-sized bag to the large bag and seal
In Camp:
+Remove the bag with the coconut powder, peanut butter, and cashews.  Also remove the True Lime and sriracha sauce. 
+Break up the ramen in it's pack, then open it and pour the ramen and the vegetables in your cook pot.  Remove the ramen seasoning packet and cover the noodles and vegetables with the water level you chose for your soup. 
+Cook ramen according to package directions and turn off the heat.
+Add the ramen seasoning, powdered coconut milk, peanut butter, cashews, and True Lime packets.  Add sriracha sauce to your desired level of spiciness.  For best flavor, allow the mixture to cool off and let the flavors meld together. 

More food prep!

14 servings of mushroom stroganoff and a box full of hiker condiments at my house today! 

14 servings of mushroom stroganoff and a box full of hiker condiments at my house today! 

More than 7 pounds of mushrooms are cooked down and in my dehydrator this morning.  My box from minimus.biz showed up this morning too!  I've got individual sized packets of Franks, Cholula, lime juice, sriracha, and salsa for our meals this summer. 

Food Review - Picky Bars - Appalachian Trials